Once you create a template and load it into Slideform, you may review the output and want to make some changes to the template. The good news is that it is easy to make edits and refresh the template without having to re-do the data mapping.
1. Open the template
To open your template from within Slideform, just click Configure Data on the Project card.
Then Click the blue link on the template filename.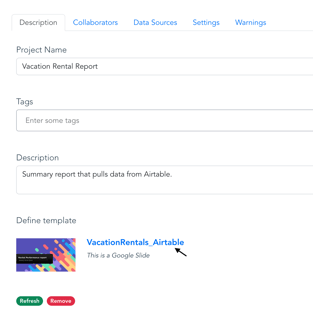
This will open the Google Slides file in a separate tab, or will trigger a download of the template if it is a PowerPoint file.
2. Make stylistic changes to the template
You may want to edit the template for any stylistic changes, such as color, styling, images, adding or deleting slides, etc.
Changes will be autosaved in Google Slides. If using PowerPoint, save the template file.
3. Add or remove pragmas
You may also add or remove pragmas in the template. Review the pragma syntax here: Create a Template
Changes will be autosaved in Google Slides. If using PowerPoint, save the template file.
4. Refresh the template in your project
After your edits are complete, open the project by clicking Configure Data on the Project card.
⇒ If using Google Slides: click the green Refresh button under the template thumbnail.
⇒ If using PowerPoint: click the red Remove button under the template thumbnail. Then upload the new template file in the space indicated.
If you added any new pragmas to the template, be sure to complete the data mapping for those pragmas.
5. Save the project
Scroll down to the bottom of the Configure Data page and click save :). Your new template is ready to use.
Video walkthrough: